
At Typefi, we love Adobe InDesign! It’s probably the most powerful desktop publishing software out there, and nothing beats it for long document publishing. It has thousands of powerful built-in tools to help bring your exact vision to life.
I’ve spent decades working with InDesign. In that time, I’ve learned quite a bit—and I’m still learning new tricks all the time! Most of InDesign’s basic tools are easy to find and intuitive to use, but there are scores of powerful features just below the surface that require a bit of digging to discover.
InDesign’s less obvious features can save you heaps of time. I hope these five little-known InDesign tools help streamline your workflow!
1. Use “Quick Apply” to quickly find your way
Quick Apply is like a live search of the InDesign interface. You can use it to find commands and tools within InDesign, which is helpful when you can’t remember where they are in the exhaustive InDesign menus.
Look for it in the Control Panel at the top of the InDesign UI—the little lightning icon on the right side will bring up the Quick Apply panel. Alternatively, you can use Ctrl+Enter (Windows) or Cmd+Enter (Apple).

Quick Apply for Paragraph Styles
You can use Quick Apply to find almost anything in InDesign, but it’s especially helpful for long documents with hundreds of Paragraph Styles.
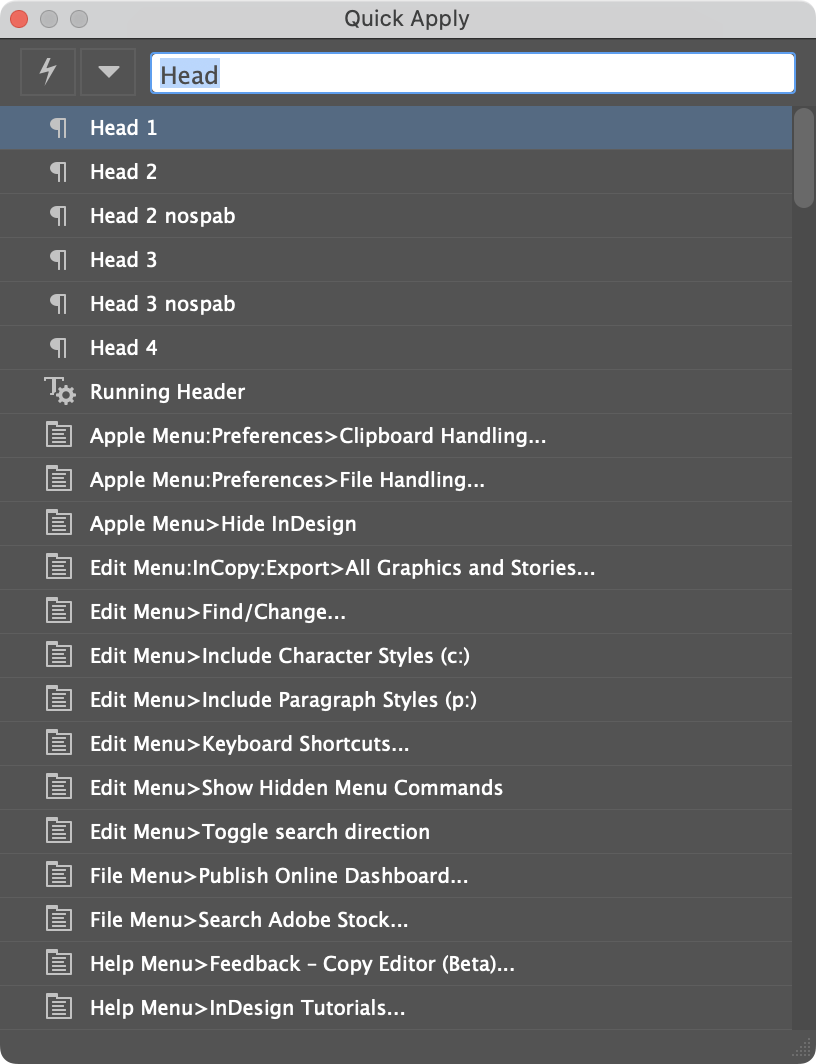
If you’re searching for a Paragraph Style, just type in the style name. Partial matches are recognised, so if the style name contains part of the search phrase it will show up in Quick Apply.
In this screenshot, I’ve searched for “Head”—I can see all the Paragraph Styles containing this term (noted by the ¶ icon) as well as other InDesign menu items related to the search term.
Use the arrow keys to select a Paragraph Style from the list. Once the style you want is highlighted, there are a few options to apply it.
- Hit Enter to apply the style to some selected text.
- Use Alt+Enter to apply the style and remove any overrides.
- Use Ctrl+Enter / Cmd+Enter to edit the style. This is the same as going to the Paragraph Styles panel and right-clicking on the style to edit.
To exit Quick Apply, just tap “Esc” on your keyboard.
Refine Quick Apply searches
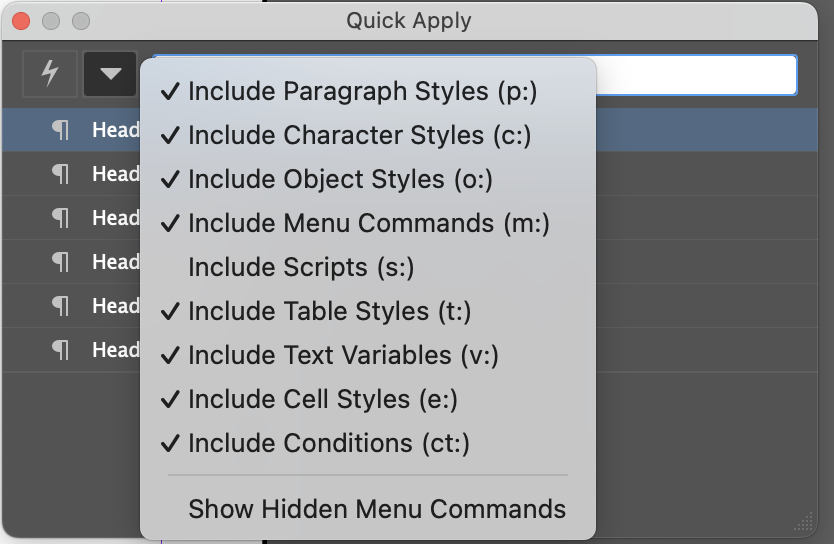
It’s possible to narrow your Quick Apply searches to specific styles and commands using some simple prefixes.
For example, use “p:” before the search term to search only Paragraph Styles.
There are many other prefixes too, and you can combine them—click the dropdown to the left of the search bar to see a list.

2. Use Find/Change to insert anchored frames
A very useful feature of InDesign Find/Change is the ability to insert something you’ve copied to the clipboard.
This is particularly helpful if you want to insert anchored frames alongside some specific content throughout your publication.
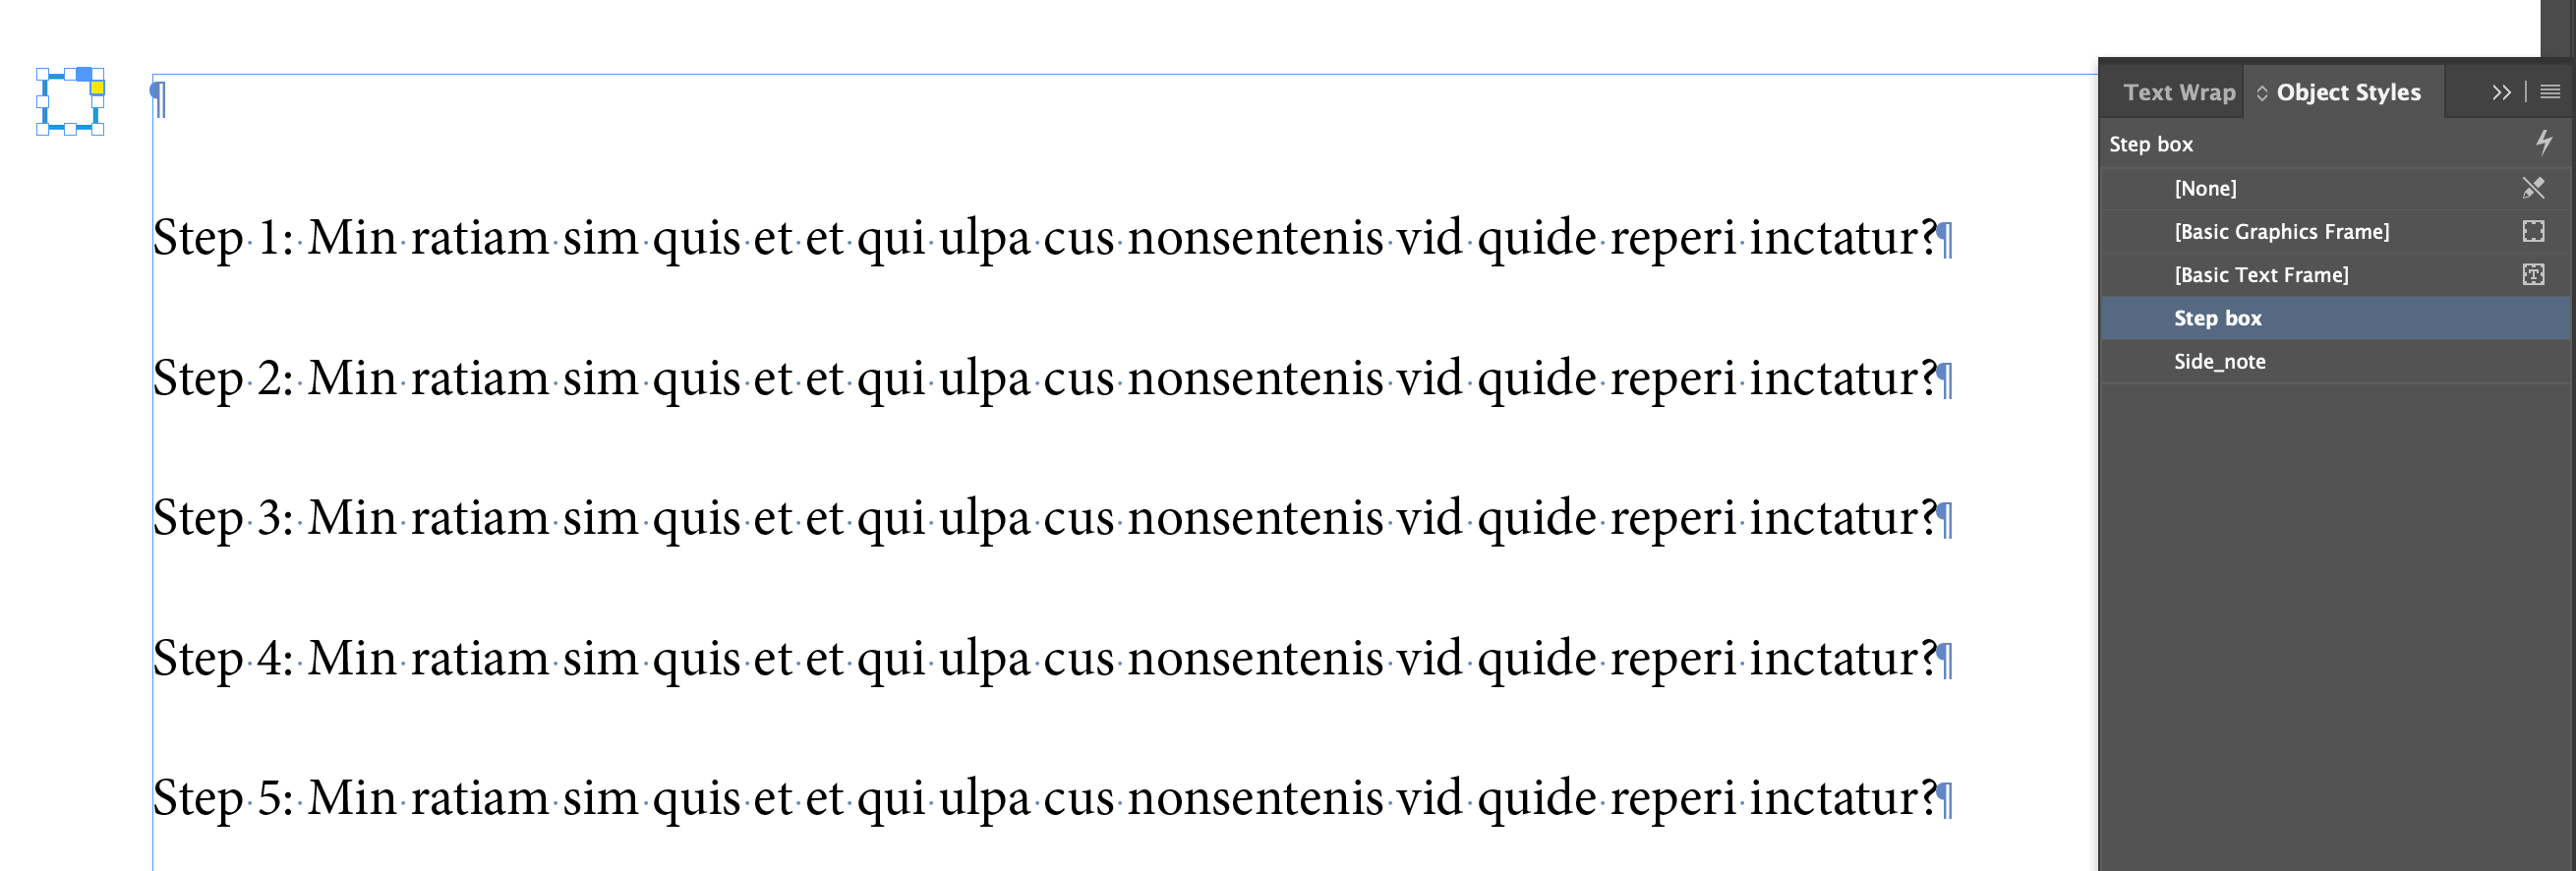
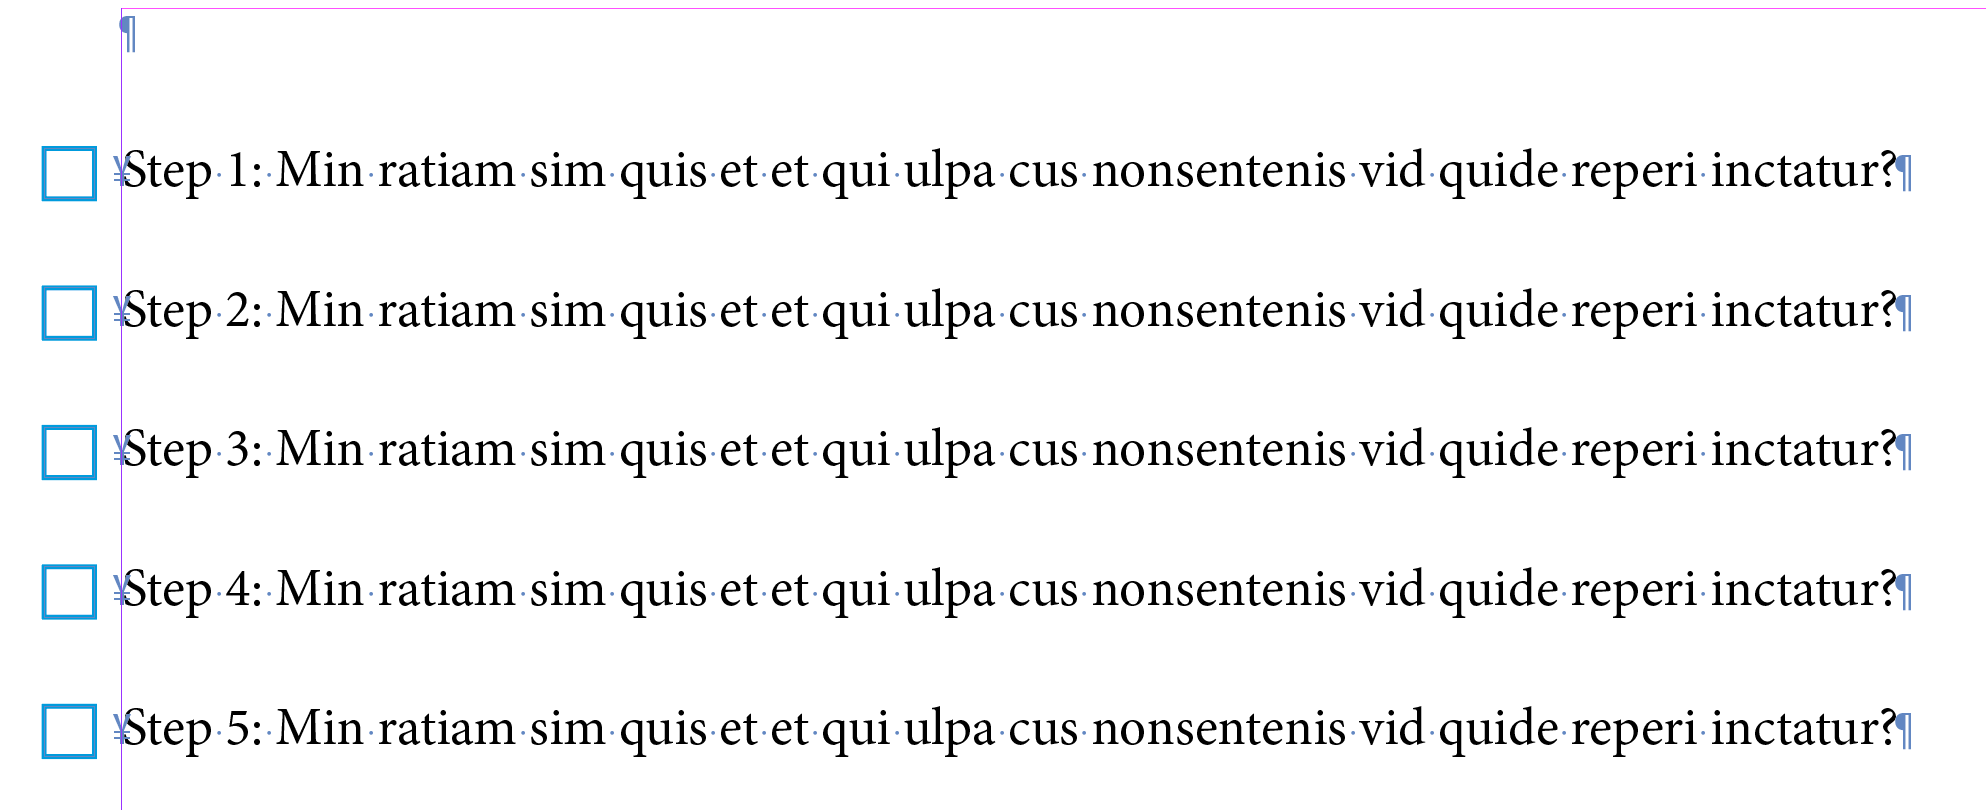
In the example below, I have a small checkbox with a blue border that I would like to anchor next to each “Step” in the text. The checkbox has an object style applied.
- First, select the checkbox and use Ctrl+C / Cmd+C to copy.
- Then, open Find/Change (Edit > Find/Change).
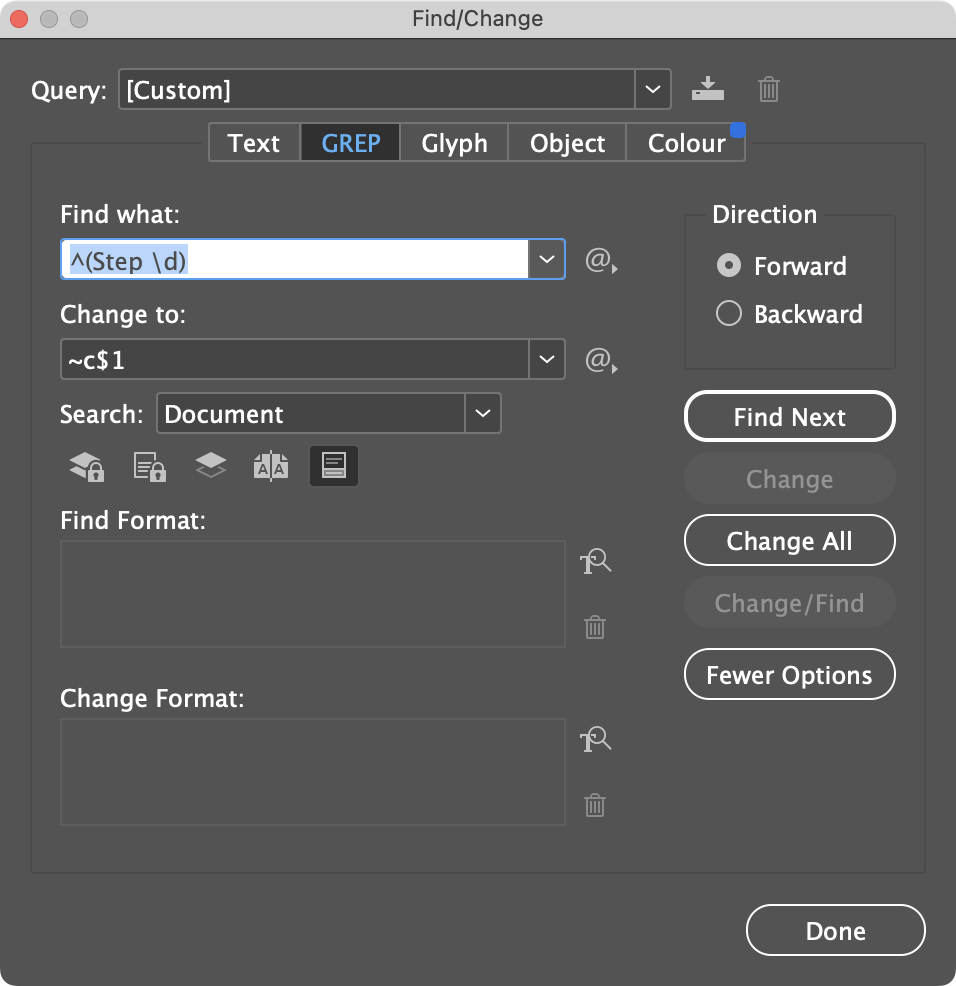
- Click on the GREP tab and enter a search pattern in the “Find what” and “Change to” fields.
- In this example, ^(Step \d) is looking from the start of each paragraph (^) for the text “Step“ followed by a single digit (\d).
- To add the frame copied in Step 1, enter ~c to insert the formatted copied content, then follow that with $1 to insert the copied content before the text we searched for using ^(Step \d).
- Click “Done” and the styled checkbox frames will be inserted as anchored objects in the text.
3. Bring text inside a frame when at top of page
With some InDesign document setups, when text appears at the top of a page and the text frame’s First Baseline Offset is set to “x Height,” the ascenders can poke above the top of the frame.
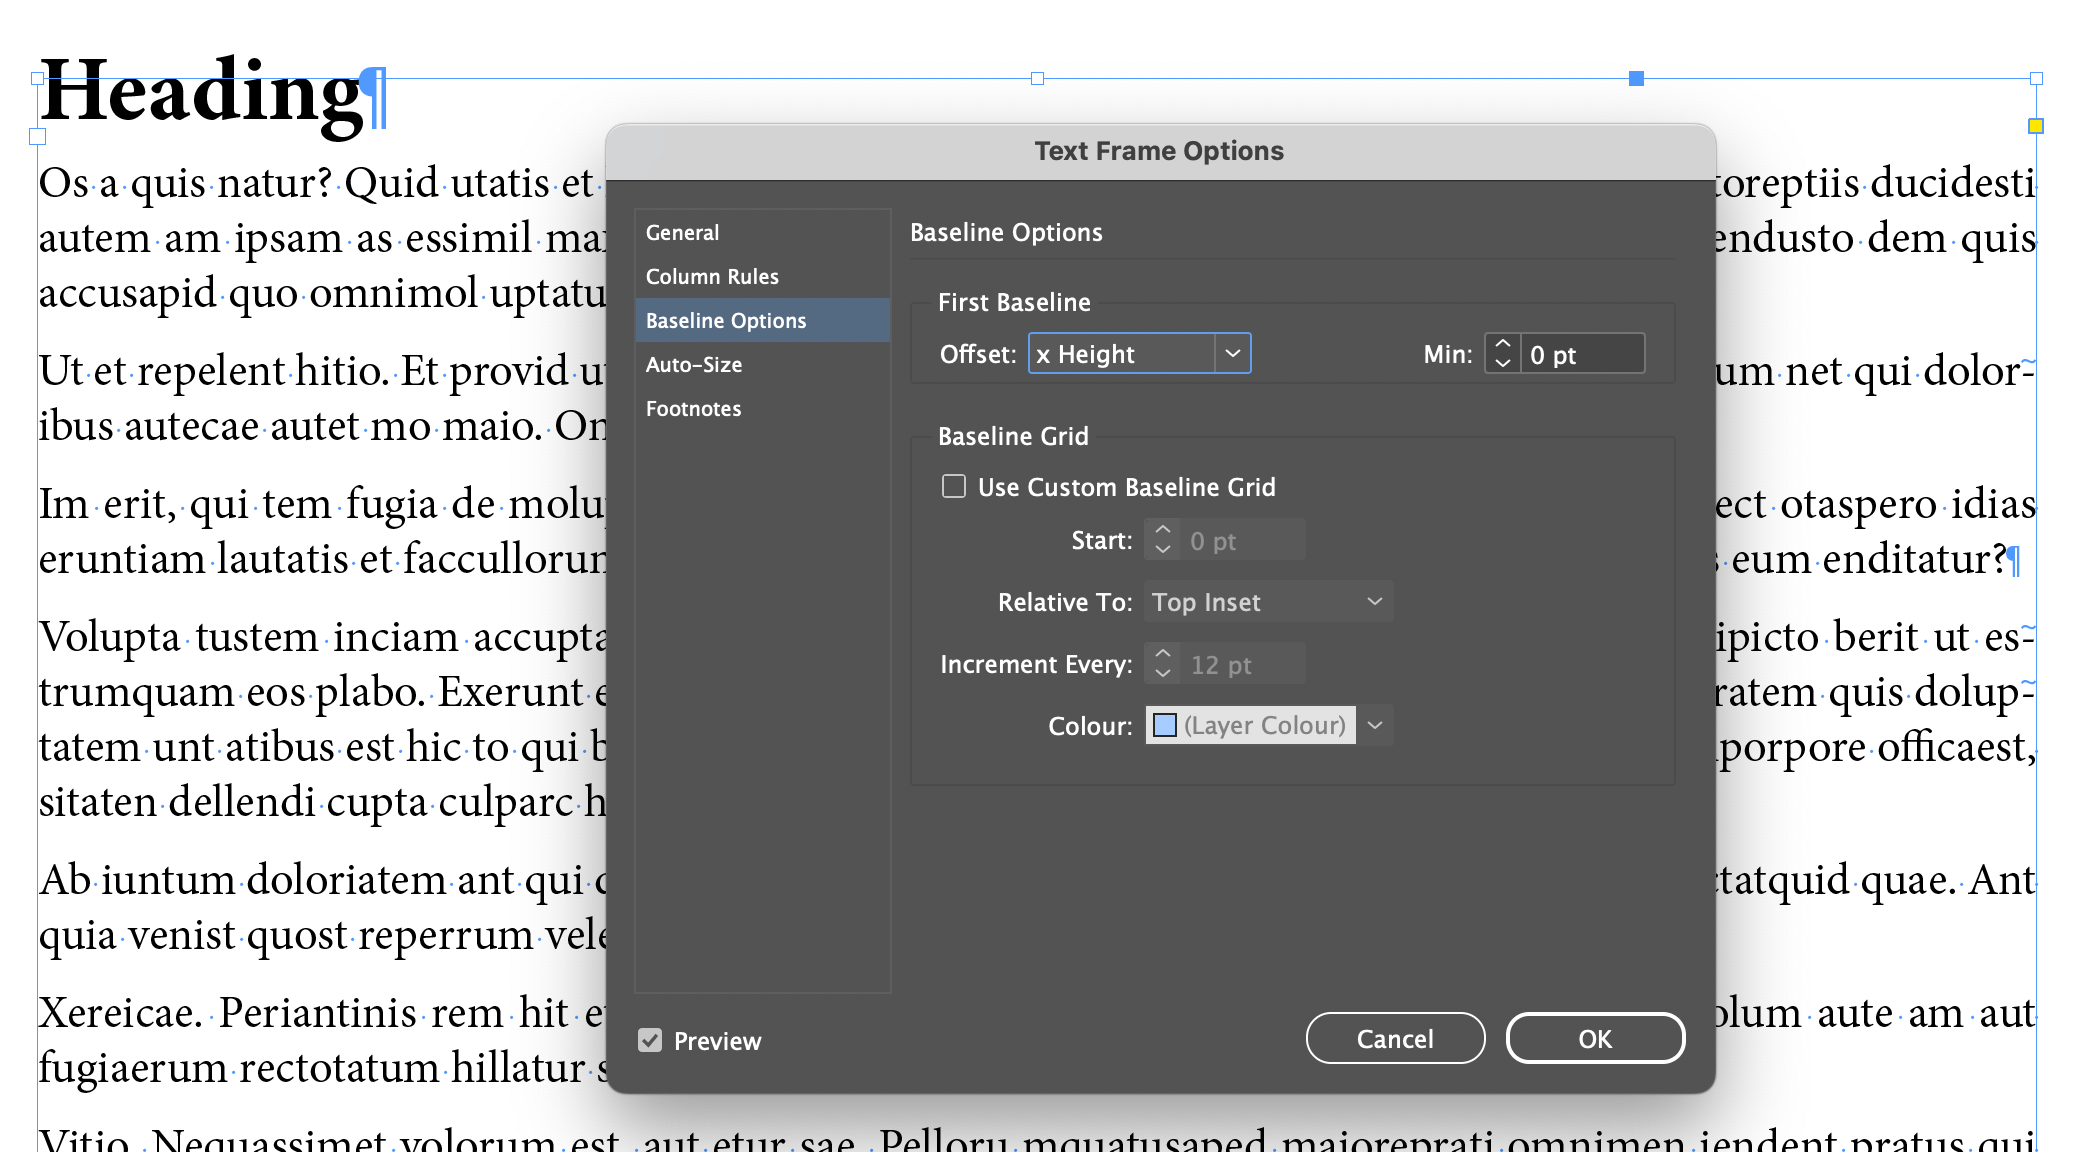
Sometimes this is perfectly fine, but if content is lined up across a spread, the ascenders should line up with the top of the frame.
Adjusting the frame’s Baseline Options could be a solution, but if you forget which frame was adjusted, this can cause big problems when content is rerun.
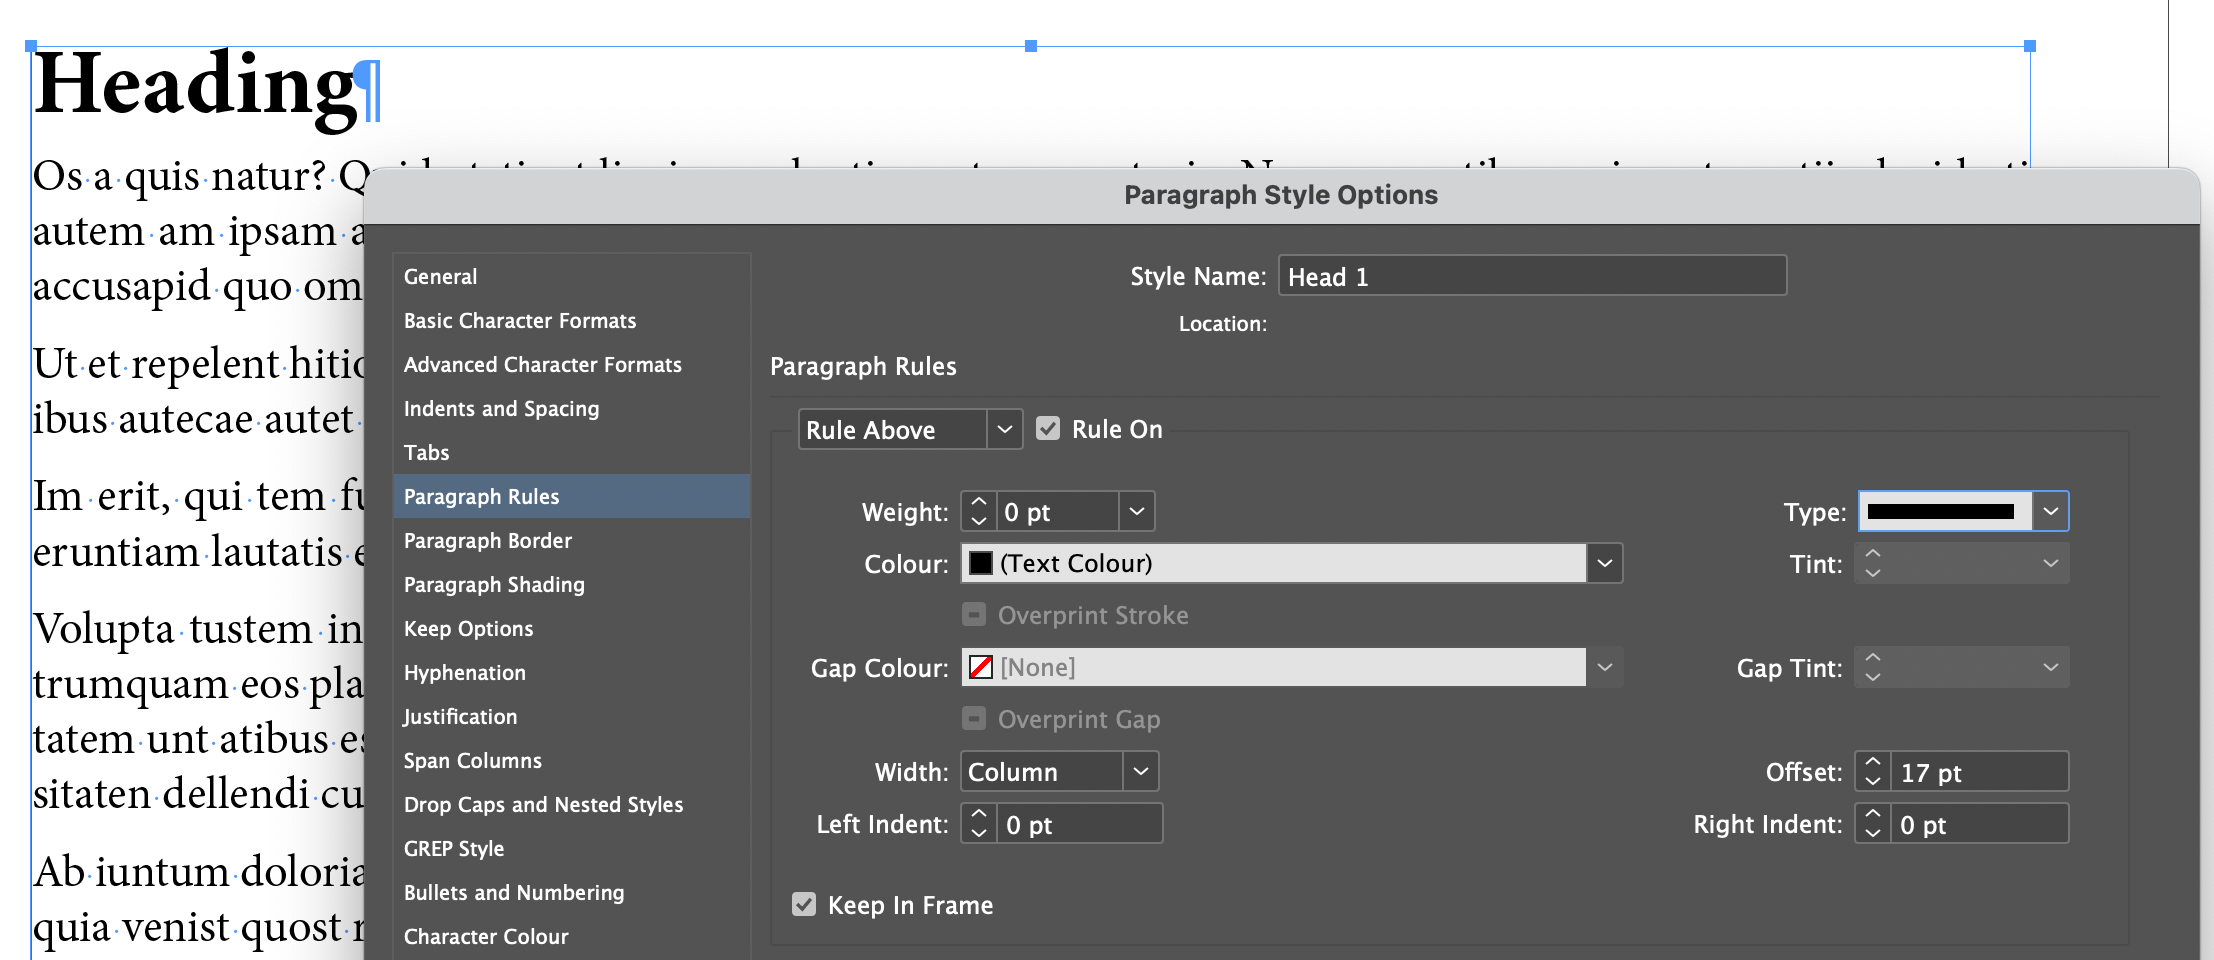
To keep the ascenders in line, instead use the Rule Above setting “Keep in Frame” within the Paragraph Style.
Since it’s set within the Paragraph Style, the setting will be honoured in every frame the style appears even when content is rerun.
- Within the Paragraph Style Options > Paragraph Rules, tick Rule Above > Rule On, and then tick Keep In Frame.
- Set the Weight to 0.5 pt. This is temporary, just so you can see where the rule appears in relation to the text.
- Adjust the Offset so that the almost invisible rule moves to just above the ascender of the heading or text.
- Once you’ve set the Offset so the text sits inside the top of the frame edge, change the Weight to 0.
4. Quickly see style overrides
It can be time-consuming to locate text with style overrides inside your document, especially if you have a lot of overrides.
InDesign has two simple built-in functions to help you: the first reveals where styling overrides have been applied to the text, and the second shows you what the overrides actually are.
Reveal style overrides within text
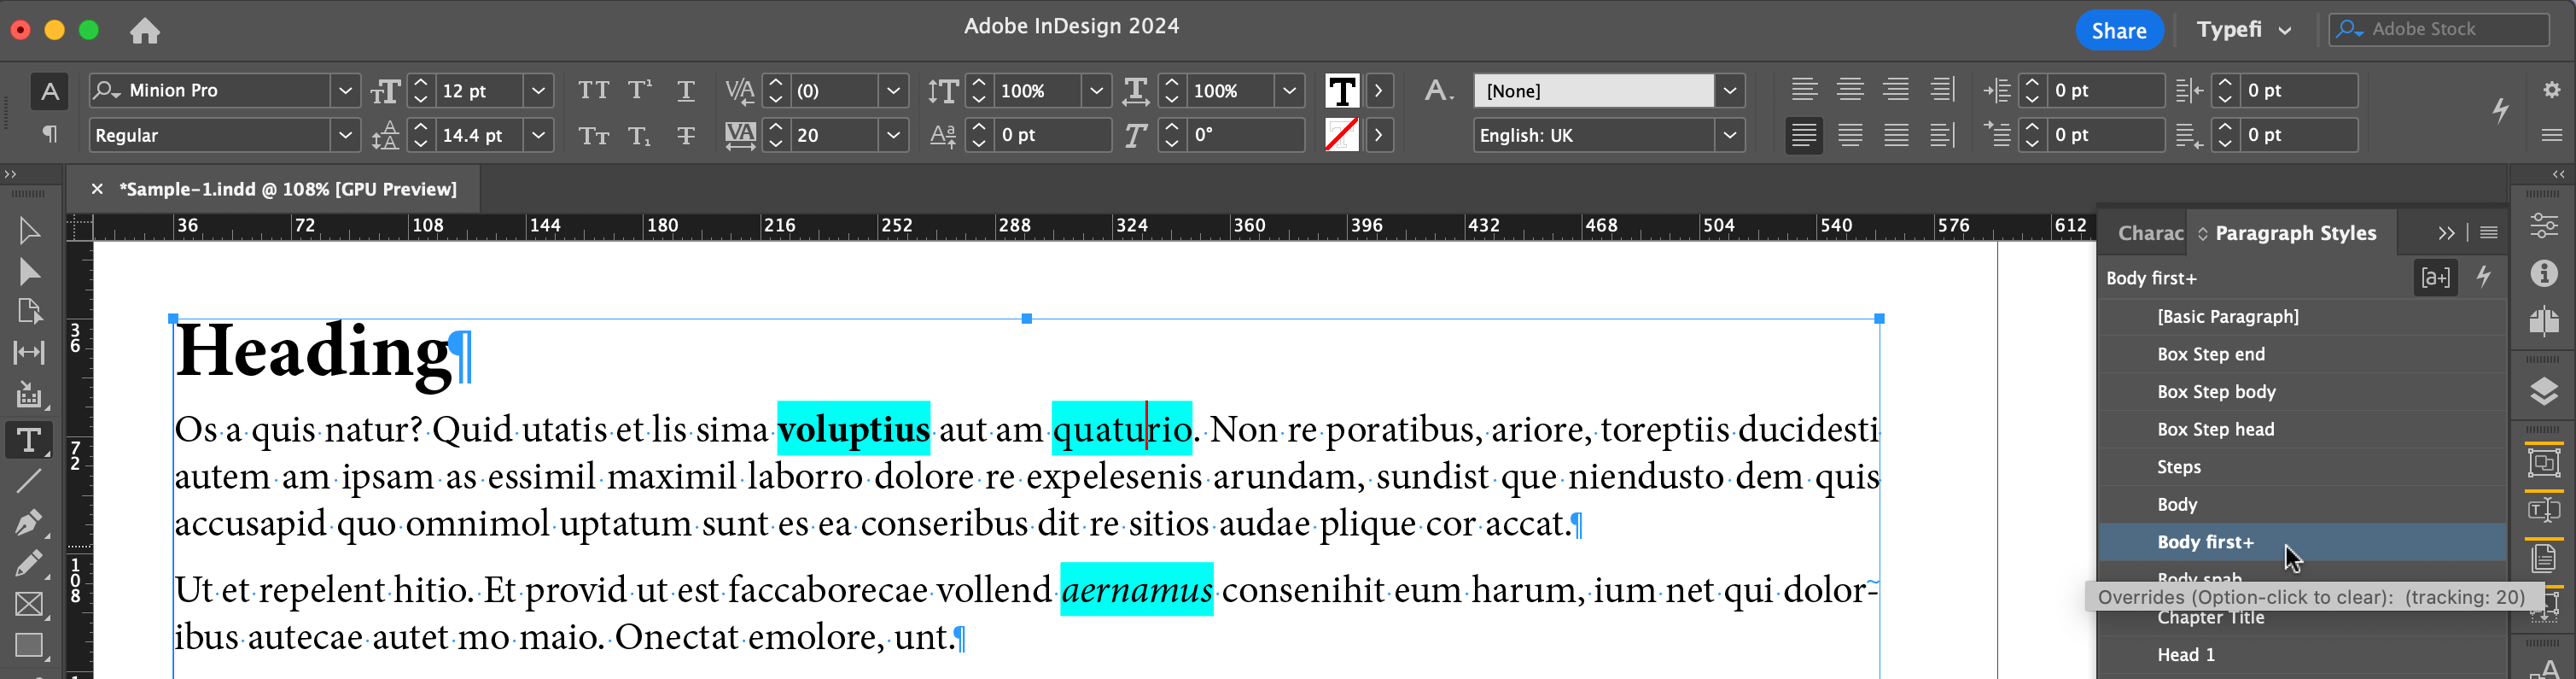
To see all the places you’ve used style overrides within the text of your document, open the Paragraph Styles panel and click on the [a+] icon at the top right.
This will enable the Style Override Highlighter—when active, it will highlight content that does not match the formatting of the applied paragraph style.
Quickly see style override settings
To see what override settings have actually been applied to your text, enable the Style Override Highlighter and place your text cursor in some of the highlighted text. Then, hover over the Paragraph Style applied to that text.
A short description of the overrides will appear as you hover over the style in the list. In the screenshot, you can see that tracking of 20 has been applied which is overriding the settings in the “Body first” style.
5. Auto size and link frames and objects
InDesign offers some robust frame features out of the box. You can size frames automatically based on the content, and link frames to anchors in the text.
Accessing these settings is easy, but they’re a bit buried in the menus. It’s also important to know that text frames and graphic frames have different frame resizing options in InDesign.
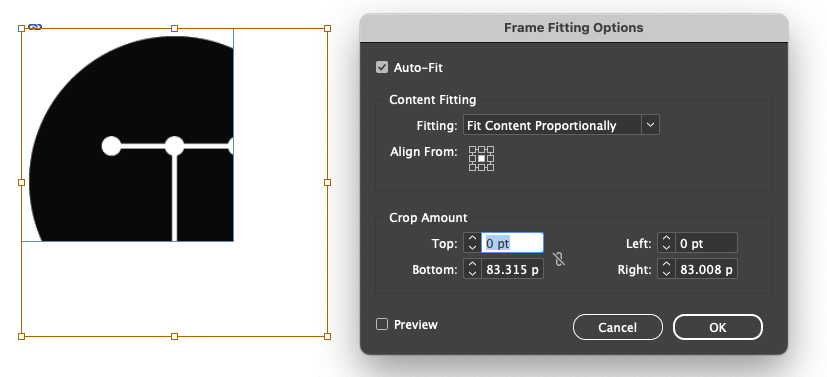
How to create InDesign auto size graphic frames
- Select a graphic frame and navigate to Object > Fitting > Frame Fitting Options.
- Check the “Auto-Fit” box—this will update the image size dynamically as the frame is resized. If the image has already been resized or cropped, InDesign will preserve these adjustments when the frame is resized.
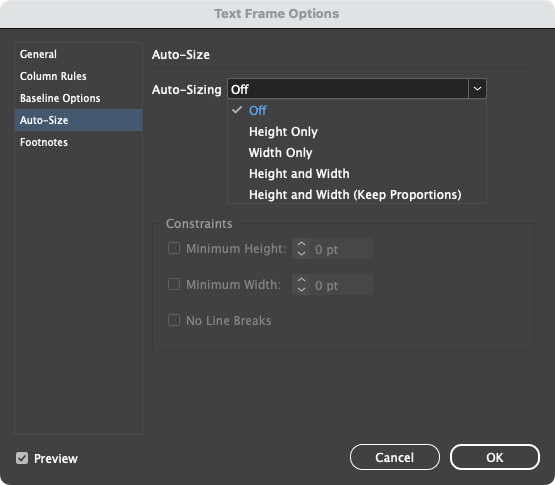
How to create InDesign auto size text frames
- Select a text frame and navigate to Object > Fitting > Fit Frame to Content. This fits the frame to the content, but it’s not dynamic—this will only fit the frame to the content at the time you click this option.
- With the frame still selected, head to Object > Text Frame Options > Auto-Size. From this menu, you can set your text frame to dynamically expand or contract whenever the content changes.
Free InDesign auto size plug-in
The built-in InDesign auto size features are pretty powerful, but as you can see, they’re buried in the menus. Adjusting them for dozens of frames can be tedious. Fortunately, Typefi has a solution!
Typefi AutoFit is a free InDesign plug-in that brings all these options out of the menus and into a handy little panel. It also adds a few features Adobe forgot.
With AutoFit, you can do everything I already mentioned plus set maximum width and height on frames and link objects into parent-child relationships so that resizing or moving the parent automatically resizes or moves the child by the same amount.
It’s a massive time-saver and an easy way to make layouts responsive to their content. Watch this AutoFit demo video to see it in action, then sign up for a free AutoFit download.
Do more with Adobe InDesign
Even after decades of using Adobe InDesign, I’m still learning new ways to get things done. That’s just the nature of this software—it can do so much, and there will always be something you don’t know.
I hope these tips help you work faster with InDesign. Check out our other articles for more InDesign tips!
- More ways to use InDesign Paragraph Styles
- How to use InDesign scripting to automate charts and graphs
- Free InDesign scripts by Peter Kahrel
- Learn the basics of GREP
- Footnote workarounds and scripts for InDesign

Damian Gibbs
Solutions Consultant | South Africa
Damian started out as an apprentice typesetter over 20 years ago at a leading South African educational publisher, and from the start was curious about the opportunities that digital technologies bring to publishing. He transitioned to general market publishing and eventually became a service provider to local and offshore publishers covering a diverse range of publishing markets, all requiring varying workflows and output requirements.
Damian has extensive experience working with publishers to develop and support automated publishing workflows and transition from pure print to digital outputs such as web, e-books, and CMS publishing.